

By using VS Code, you agree to its license and privacy statement. By using VS Code, you agree to License & Privacy.
Documentation
Topics Select a topic Overview Download and Install Get to Know VS Code Agents Quickstart Editor Tutorial Intro Videos Overview Get Started Find a Guide Set Up GitHub Copilot Agents Quickstart Agents Tutorial Cloud Continuity Tutorial Best Practices Work with AI Inline Suggestions Chat View Agents Window Inline Chat & Quick Chat Use Chat Canvases Add Prompt Context Review & Revert Changes Configure the Agents Window Plan and Run Tasks Plan Work Use Tools Browser Tools Subagents Automations Sessions Manage Sessions Organize & Triage Sessions Memory Artifacts Permissions and Security Approvals & Permissions Agent Sandboxing AI Security Choose Models and Agents Choose and Configure Models Choose an Agent Harness Move from Local to Copilot Compare Model Results Customize and Extend Overview Plugins Agent Skills Instructions Custom Agents Copilot Connectors Add and Use MCP Servers Manage MCP Servers Hooks Prompt Files Migrate Existing Customizations Work Across Apps and Machines Remote Agent Sessions Cloud Sessions Session History Tutorials & Guides Find a Guide Explore a Codebase Add a Feature Fix a Bug Refactor Safely Add Tests Test Web Apps Run Parallel Tasks Get Back on Track Adapt Agents to Your Project Context Engineering Test-Driven Development Jupyter Notebooks Reduce Credit Usage Prompt Examples Concepts Agents How Models Work Context Tools Sessions and Chats Trust & Safety Agent Harnesses Agent Customization Reference and HelpReference Cheat Sheet Tools and Context Workspace Context Settings Reference VS Code Pet Custom Agent File Reference Custom Instructions Reference Agent Plugin Authoring Reference MCP Configuration Hooks Reference OpenTelemetry Monitoring Agent Host Architecture Troubleshooting Troubleshooting Debug Chat Interactions Diagnose Prompt Caching FAQ Overview Getting Started Editor Tutorial User Interface Tips and Tricks Write code Basic Editing IntelliSense Inline Suggestions Smart Actions Code Navigation Refactoring Snippets Workspaces Overview Multi-Root Workspaces Workspace Trust Configure the editor Display Language Layout Keyboard Shortcuts Settings Settings Sync Extensions Overview Extension Marketplace Extension Runtime Security Themes Profiles Accessibility Overview Voice Interactions Command Line Interface Telemetry Reference Default Keyboard Shortcuts Default Settings Substitution Variables Tasks Schema Overview Quickstart Repositories & Remotes Staging, Commits & Undo History & Blame Branches, Stashes & Worktrees Merge Conflicts Collaborate on GitHub Troubleshooting FAQ Get Started Terminal Basics Terminal Profiles Shell Integration Appearance Advanced Debugging Debug Configuration Tasks Testing Integrated Browser Port Forwarding Guides & Tutorials Test-Driven Development Test Web Apps Overview Enterprise Policies Manage AI Settings Extensions Telemetry Updates Overview VS Code for the Web SSH SSH Tutorial Tunnels Dev Containers WSL WSL Tutorial GitHub Codespaces VS Code Server Linux Prerequisites Tips and Tricks FAQ GitHub Copilot Setup Linux macOS Windows Raspberry Pi Network Portable Mode Additional Components Uninstall Languages & Runtimes Extension DocsOn this page there are 6 sections
Java Web Apps with Visual Studio Code
This tutorial shows you how to create a Java web application with Visual Studio Code. You'll learn how to deploy a Java web application to a Linux Tomcat server in Azure App Service.
Scenario
A simple Hello World web app.

Before you begin
Before running and deploying this sample, you must have the Java SE Development Kit (JDK) and Apache Maven build tools on your local development environment. If you don't have, please install them.
Download and install the Extension Pack for Java, which has JDK 11 included.
Note: The
JAVA_HOMEenvironment variable must be set to the install location of the JDK to complete this tutorial.
Download Apache Maven version 3 or greater:
Install Apache Maven for your local development environment:
Create a Maven Web App project
maven-archetype-webapp is an archetype which generates a Maven Web App project. To learn more, you can visit this documentation.
- In an empty folder, run the following command to generate a new project from a Maven archetype.
cd webapp-project
Deploy Web Apps to the cloud
We just built a Java web application and ran it locally. Now you will learn how to deploy from Visual Studio Code and run it on Azure in the cloud.
If you don't have an Azure subscription, you can sign up for a free Azure account.
Create your free Azure account
Install the Azure App Service extension
The Azure App Service extension is used to create, manage, and deploy to Azure App Service with key features including:
- Create new Azure Web App/Deployment Slot
- Deploy to Azure Web App/Deployment Slot
- Start, stop, and restart the Azure Web App/Deployment Slot
- View a Web App's log files
- Swap Deployment Slots
To install the Azure App Service extension, open the Extensions view (X (Windows, Linux Ctrl+Shift+X)) and search for azure app service to filter the results. Select the Microsoft Azure App Service extension. For a more command-line Maven-centric experience, you can also check out the Maven plugin for Azure App Service Linux tutorial.
Sign in to your Azure subscription
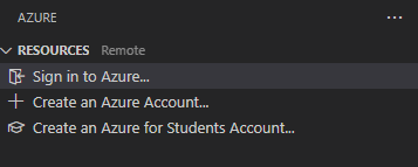
To sign in to Azure, run Azure: Sign In from the Command Palette (P (Windows, Linux Ctrl+Shift+P)). Or you can sign in to your Azure Account by clicking Sign in to Azure... in RESOURCES Explorer.

Create a new Web App on Azure
Once the extension is installed, you can take the following steps to create a new Web App on Azure.
-
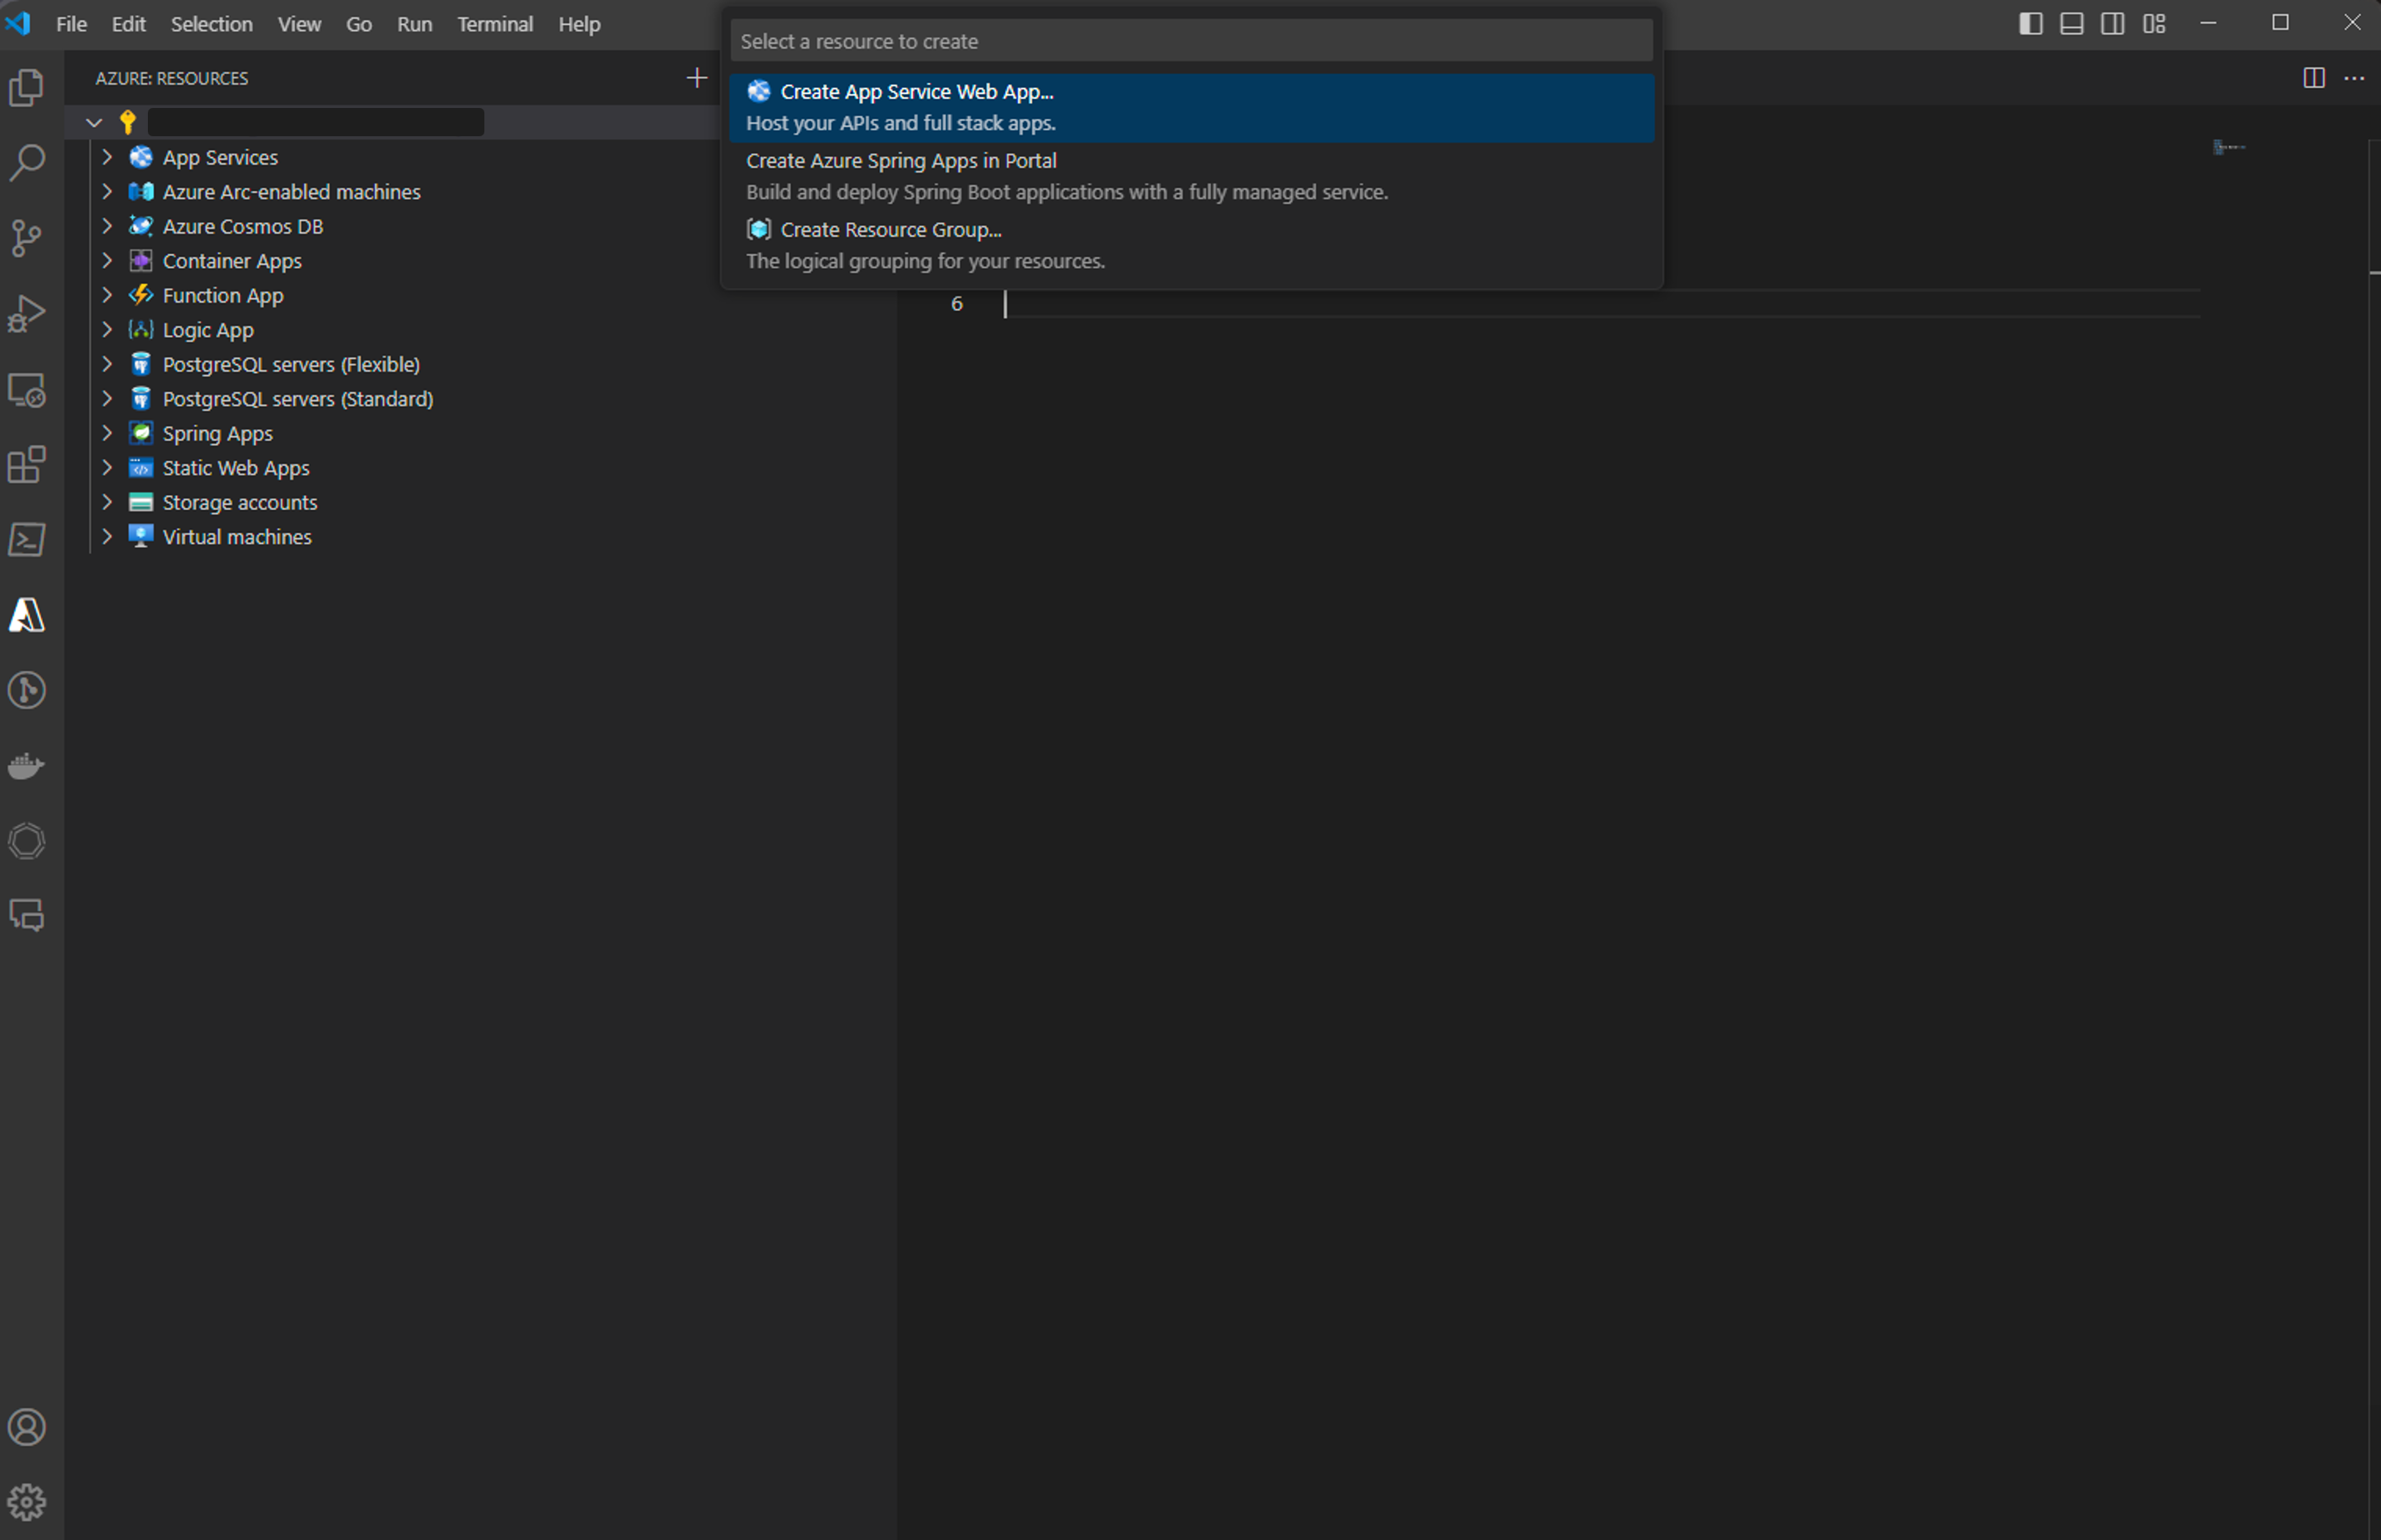
Click Create button on the RESOURCES Explorer view and select Create App Service Web App....
-
Enter a unique name for the new Web App.
-
Select the runtime task of the Web App, for example
Java 17. -
Select the Java web server stack, for example
Apache Tomcat 10.0. -
Select a pricing tier, for example
Free(F1).


Build and deploy to a Web App
The deploy process leverages the Azure Resources extension (installed along with the Azure App Service extension as a dependency) and you need to sign in with your Azure subscription. If you do not have an Azure subscription, sign up today for a free 30 day account and get $200 in Azure Credits to try out any combination of Azure services.
Once you have signed in, you can open the command prompt or terminal window and build the project using Maven commands. This will generate a new war or jar artifact in the target directory.
| Web Proxy Viewer | New URL | Original Page |